
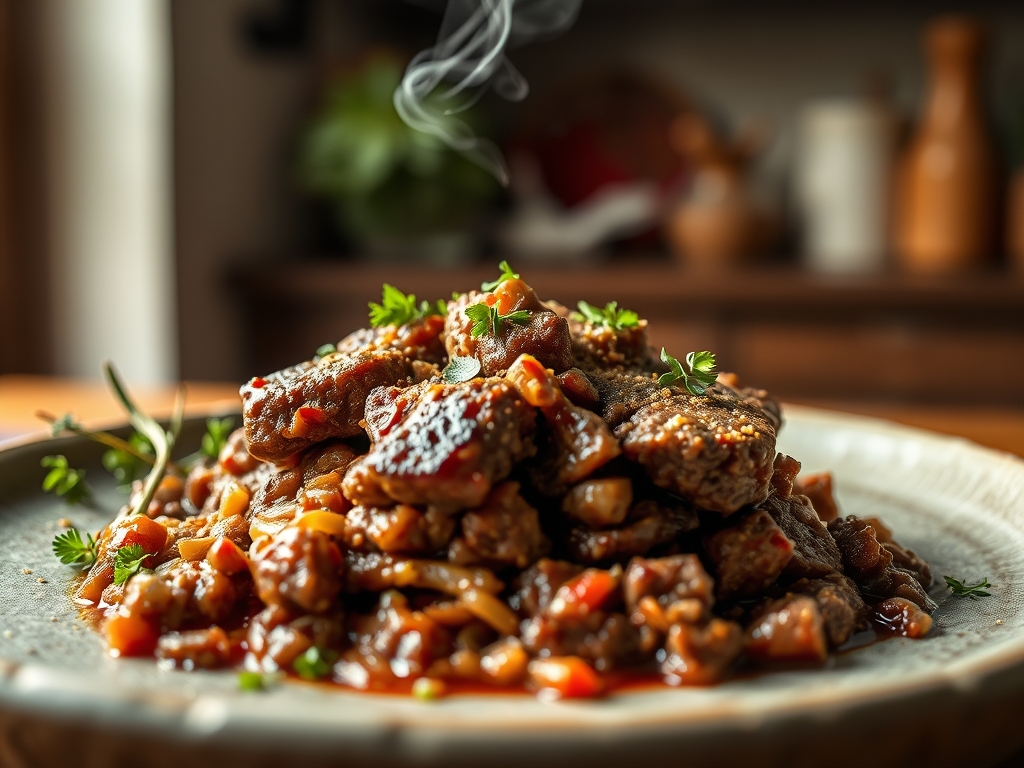
Picture the sound of a heavy-bottomed cast iron skillet meeting a flame; that sharp, rhythmic sizzle is the overture to your week. We are moving past the era of bland, gray crumbles. By mastering ground beef recipes for meal prep, you are essentially building a flavor foundation that relies on high-quality lipids and the Maillard reaction to ensure your Tuesday lunch tastes like a Friday night indulgence.
This is not just about survival; it is about culinary efficiency. Ground beef is a biological powerhouse of heme iron and amino acids, but it is also a canvas for global flavor profiles. Whether you are craving the piquant kick of a Korean bulgogi bowl or the comforting, viscous richness of a classic Bolognese, the secret lies in how you manipulate the proteins and fats during the initial sear.
The beauty of these ground beef recipes for meal prep is their modularity. One massive batch of perfectly rendered beef can pivot into nine distinct identities. We are going to treat your kitchen like a laboratory and a high-end bistro, ensuring every container in your fridge is a masterpiece of texture and thermal stability.
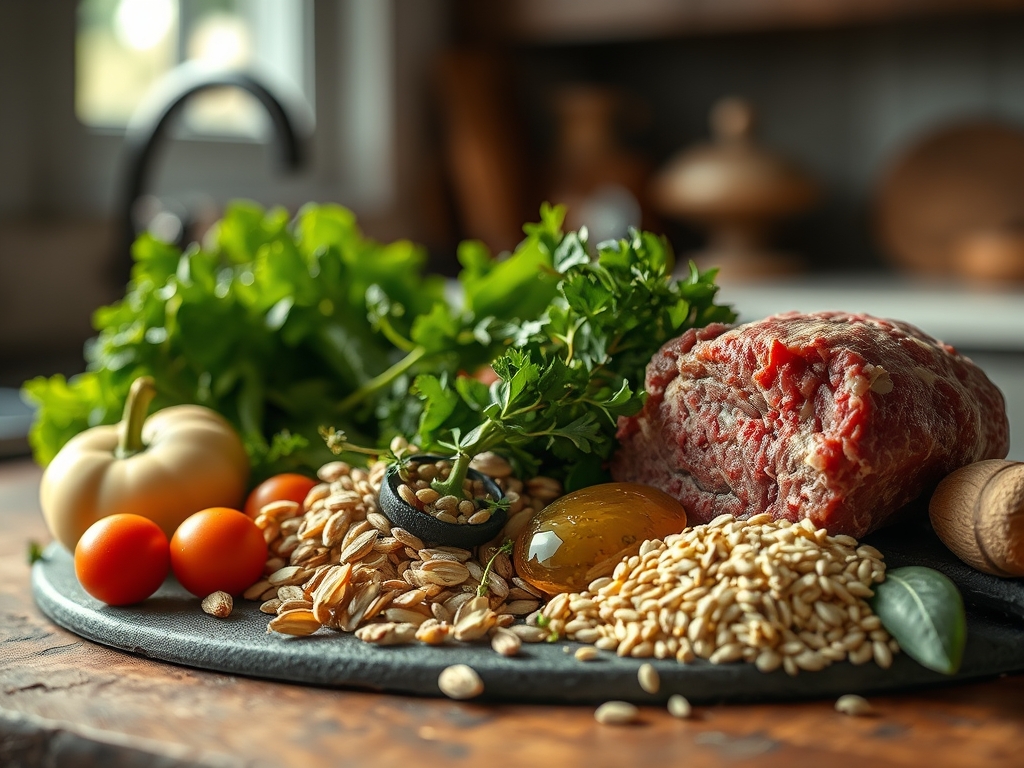
The Gathers:
To execute these nine variations, your mise-en-place must be impeccable. Start with the beef itself; look for an 80/20 or 85/15 lean-to-fat ratio. The fat is not just for flavor; it acts as a heat transfer medium that ensures even browning. You will need a digital scale to portion your proteins with precision, ensuring your macros remain consistent across all nine meals.
Gather your aromatic base: yellow onions, garlic cloves, and ginger. Use a microplane to grate your aromatics into a fine paste; this increases the surface area, allowing the essential oils to infuse the fat more rapidly. For the "Smart Substitutions," consider using finely minced mushrooms (the "blendarian" method) to add earthy umami and fiber while reducing caloric density. If you are avoiding nightshades, swap paprika for a touch of turmeric and cumin to maintain a golden, appetizing hue without the heat.
Essential tools for this stage include a sharp chef's knife for uniform dicing and a bench scraper to transition your ingredients from the cutting board to the pan without losing a single morsel. Have your deglazing liquids ready: beef bone broth, dry red wine, or even a splash of apple cider vinegar to brighten the heavy fats.
The Clock
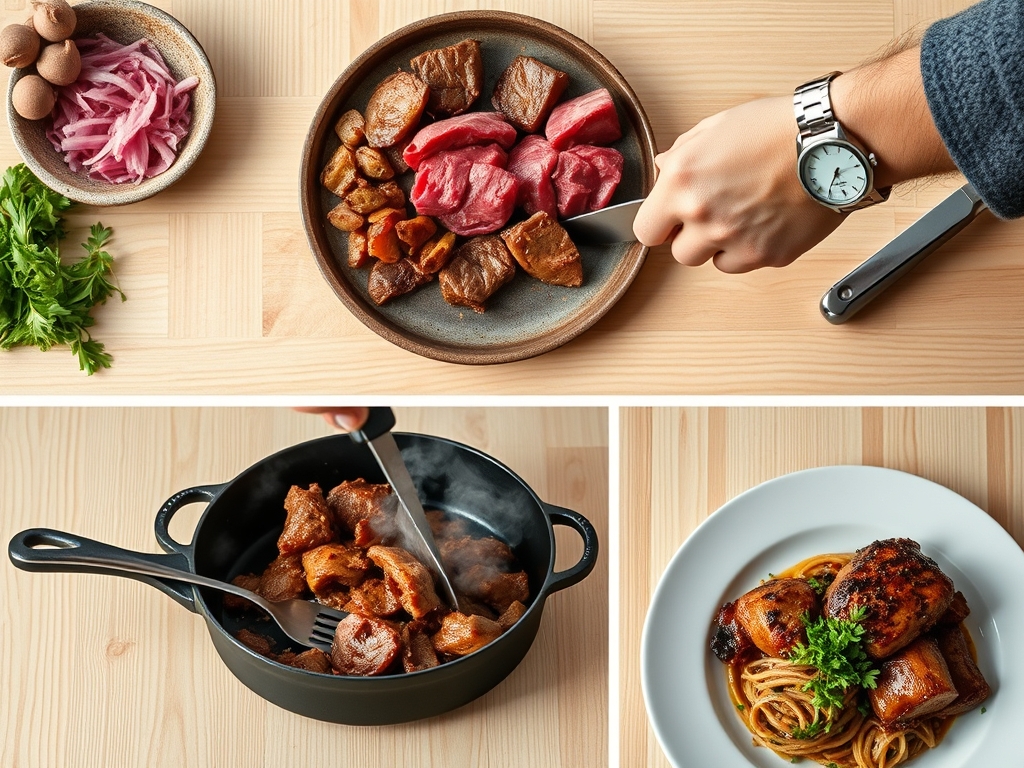
Efficiency in the kitchen is governed by "Chef's Flow," a method where you overlap tasks to minimize downtime. For these nine meals, expect a total prep time of 25 minutes and a cook time of 40 minutes. The flow starts with the "long-tail" items: start your grains (quinoa, jasmine rice, or farro) in a rice cooker or pot first.
While the grains hydrate, tackle your vegetable prep. By the time your heavy-bottomed skillet is screaming hot, your aromatics should be ready to hit the oil. The actual browning of five pounds of beef should be done in batches; overcrowding the pan leads to steaming rather than searing, which ruins the texture. If you follow this flow, you will have nine distinct meals cooled and lidded in under 75 minutes.
The Masterclass
1. The Hard Sear
Place your beef in a preheated skillet. Do not move it for at least three minutes. You are waiting for the Maillard reaction, a chemical dance between amino acids and reducing sugars that creates that signature crust.
Pro Tip: This reaction only occurs when surface moisture has evaporated. Use a paper towel to pat the meat dry before it hits the pan to accelerate browning and prevent gray, boiled meat.
2. Deglazing the Fond
Once the meat is browned and removed, you will see brown bits stuck to the bottom. This is "fond," concentrated flavor gold. Pour in a splash of liquid and use a wooden spoon to scrape it up.
Pro Tip: Deglazing is a form of solvent extraction. The liquid dissolves the caramelized proteins, allowing you to re-incorporate that intense flavor back into your sauce or base.
3. Emulsifying the Sauce
When adding liquids like tomato sauce or broth, whisk in a cold pat of butter or a teaspoon of starch slurry. This creates a viscous emulsion that clings to the beef.
Pro Tip: Emulsification prevents the "oil slick" effect in your meal prep containers. A stable emulsion ensures the fat stays integrated into the sauce rather than separating during the cooling process.
4. Flash Cooling
Spread your cooked beef on a sheet pan rather than leaving it in a deep bowl. This increases the surface area for heat to escape.
Pro Tip: Rapid cooling prevents thermal carryover, where the residual heat continues to cook the meat, potentially making it tough and dry by the time you reheat it on Wednesday.
The Deep Dive
From a nutritional standpoint, ground beef is a "complete protein," containing all nine essential amino acids. A standard 4-ounce serving provides roughly 25 grams of protein and significant doses of Vitamin B12. For those following a Keto protocol, maintain the high fat content and pair with cruciferous vegetables. Vegan enthusiasts can mimic this texture using a pea-protein crumble, though you must add a teaspoon of liquid smoke to replicate the deep, charred notes of beef.
The Fix-It: Common Pitfalls
- The Meat is Greasy: This happens when the fat doesn't emulsify. Fix: Add a tablespoon of tomato paste and stir vigorously; the natural pectins act as a binder.
- The Beef is Tough: You likely overcooked it during the initial sear. Fix: Add a splash of bone broth to the container before freezing; the moisture will steam the meat back to tenderness during reheating.
- The Flavor is Flat: You missed the acid. Fix: Squeeze fresh lime or lemon juice over the dish after reheating to wake up the heavy fats.
Reheating Science: To maintain "day-one" quality, use the "vented steam" method. Cover your container with a damp paper towel. This creates a micro-steaming environment that prevents the microwave from dehydrating the protein fibers, keeping the beef succulent.
The Wrap-Up
You are now armed with the molecular secrets to transform humble ground beef into a week of high-octane, gourmet fuel. By focusing on the Maillard reaction, proper emulsification, and strategic cooling, you have elevated your meal prep from a chore to a craft. Your fridge is now a curated gallery of flavor; go forth and conquer your week with the confidence of a chef who knows exactly why her food tastes so damn good.
The Kitchen Table
How do I keep meal-prepped ground beef from getting dry?
Add two tablespoons of beef broth or a light sauce to each container before sealing. When you reheat, the liquid creates steam, rehydrating the protein fibers and maintaining a succulent, tender texture.
Can I freeze these ground beef recipes for meal prep?
Yes, ground beef freezes exceptionally well. Ensure the meat is completely cool before sealing in airtight containers to prevent ice crystals. Consume within three months for optimal flavor and to avoid freezer burn.
What is the best way to reheat beef without it smelling "off"?
The "warmed-over flavor" is caused by lipid oxidation. To prevent this, include antioxidant-rich aromatics like rosemary or garlic in your initial cook, and reheat gently at 50% power to avoid scorching the fats.
Is it safe to meal prep ground beef for five days?
According to USDA guidelines, cooked ground beef is safe in the refrigerator for three to four days. For a five-day work week, freeze the last two portions and thaw them in the fridge overnight on Wednesday.