
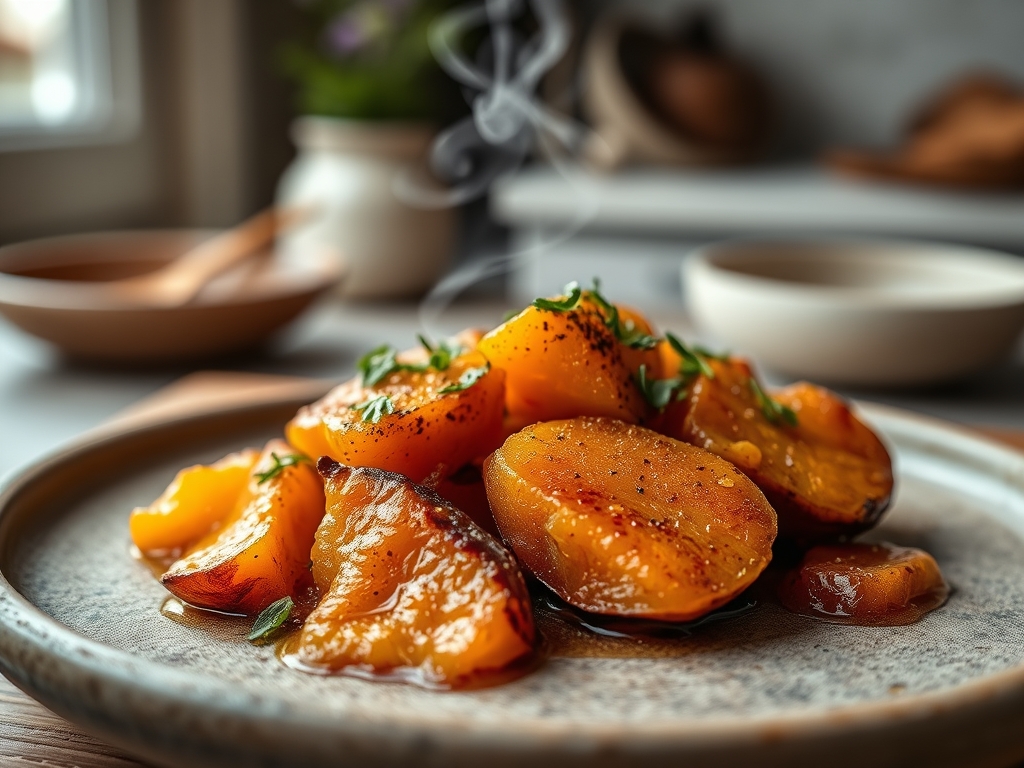
Imagine the scent of a crisp autumn morning colliding with the heavy, molten perfume of a professional pastry kitchen. That is the magic of brown sugar sweet potato recipes. When the earthy, beta-carotene richness of a garnet yam meets the molasses-heavy grit of dark brown sugar, you are not just cooking; you are performing a delicious chemical transformation. We are moving past the soggy, marshmallow-topped side dishes of the past. Instead, we are leaning into the sophisticated science of caramelization and the structural integrity of the tuber. Whether you are aiming for a glass-like glazed finish or a velvety, whipped puree, the secret lies in how you manipulate the sugars and the starch. We are going to explore seven hacks that will turn your kitchen into a high-end bistro, using professional techniques to elevate the humble sweet potato into a culinary masterpiece that balances salt, fat, and heat with surgical precision.

The Gathers:
To master these brown sugar sweet potato recipes, your mise-en-place must be impeccable. Start with the potatoes themselves. Look for Beauregard or Jewel varieties, as their high moisture content ensures a creamy interior. You will need a digital scale to measure your dry ingredients; precision is the difference between a sauce that is viscous and one that is merely watery.
Gather your aromatics: fresh ginger for a piquant bite, Madagascar vanilla beans for depth, and high-quality sea salt to provide a structural contrast to the sweetness. Your fat source is non-negotiable. Use European-style butter with a high butterfat percentage to ensure a stable emulsification when combined with the sugar.
Smart Substitutions: If you are looking to lighten the profile, swap half the butter for cold-pressed coconut oil, which provides a similar saturated fat structure. For the sugar, Muscovado offers a deeper, more infuse-ready molasses profile than standard grocery store brown sugar. If you need a lower glycemic index, coconut sugar mimics the caramel notes of brown sugar while maintaining a more stable crystalline structure during the heating process.
The Clock:
Efficiency in the kitchen is dictated by the Chef's Flow. This is the art of overlapping tasks so that no heat is wasted. For these hacks, expect a total active prep time of 20 minutes, with a thermal processing time ranging from 30 to 50 minutes depending on the density of your cuts.
Start by preheating your oven to 425 degrees Fahrenheit. High heat is essential for the Maillard reaction, the chemical reaction between amino acids and reducing sugars that gives browned food its distinctive flavor. While the oven reaches temperature, use a bench scraper to organize your chopped potatoes into uniform cubes. Uniformity is not just for aesthetics; it ensures that every piece reaches the same internal temperature simultaneously. If you are boiling for a mash, use a saucier to allow for better evaporation and heat distribution.

The Masterclass:
1. The Par-Boil Precision
Before roasting, drop your potato wedges into boiling salted water for exactly five minutes. This softens the outer starch layer without compromising the core.
Pro Tip: This process, known as starch gelatinization, creates a fuzzy surface area that, once coated in oil and brown sugar, transforms into a shatteringly crisp crust.
2. The Brown Butter Emulsion
In a heavy-bottomed skillet, melt your butter until the milk solids turn golden and smell nutty. Whisk in the brown sugar until the mixture is glossy and unified.
Pro Tip: This creates a stable emulsion. The fat encapsulates the sugar crystals, preventing them from burning at high temperatures and ensuring a smooth mouthfeel.
3. The Acid Balance
Always finish your brown sugar glaze with a splash of apple cider vinegar or a squeeze of lemon juice.
Pro Tip: Acid acts as a flavor brightener that cuts through the viscous sugar. It breaks down the sucrose, preventing the dish from tasting one-dimensional or cloying.
4. The Microplane Infusion
Grate fresh nutmeg or orange zest directly over the potatoes during the last five minutes of cooking using a microplane.
Pro Tip: Heat causes volatile oils in spices to aerate. Adding them at the end prevents these delicate compounds from evaporating, keeping the flavor profile vibrant.
5. The Thermal Shock
If you are making a sweet potato mash, use a potato ricer instead of a masher, then fold in cold butter cubes.
Pro Tip: Ricing prevents the release of excess starch, which can make the texture gummy. The cold butter creates a "mounting" effect (monter au beurre), resulting in a velvet-like finish.
6. The Glaze Reduction
After roasting, if there is liquid left in the pan, transfer it to a small pot and render it down until it coats the back of a spoon.
Pro Tip: This is a classic reduction. By evaporating the water, you concentrate the sugars and proteins, creating a professional-grade gastrique for drizzling.
7. The Carryover Rest
Never serve your sweet potatoes immediately. Let them rest on the baking sheet for five minutes after removal from the oven.
Pro Tip: Thermal carryover continues to cook the center of the potato while the exterior glaze sets and hardens, ensuring the perfect contrast in textures.
The Deep Dive:
From a macro nutrition perspective, brown sugar sweet potato recipes are a powerhouse of Vitamin A and fiber. While the sugar adds carbohydrates, the fiber in the potato helps slow the glucose absorption. For Dietary Swaps, keto followers can use allulose-based brown sugar substitutes, which caramelize similarly to sucrose. For a vegan version, use a high-quality vegan butter block rather than oil to maintain that creamy, emulsified glaze.
The Fix-It:
- Soggy Potatoes: Usually caused by overcrowding the pan. Use two sheets to ensure steam can escape.
- Burnt Sugar: If your glaze turns bitter, you have over-caramelized. Fix this by adding a tablespoon of heavy cream to the pan to stop the cooking process and mellow the flavor.
- Grainy Texture: This happens when sugar does not fully dissolve. Ensure your butter is hot enough to melt the crystals before adding the potatoes.
Meal Prep: To reheat, avoid the microwave. Use an air fryer or a hot oven for five minutes. This re-activates the fats and recrisps the sugar coating, providing "day-one" quality.
The Wrap-Up:
Mastering brown sugar sweet potato recipes is about more than just satisfying a sweet tooth; it is about understanding the intersection of heat and chemistry. By using tools like the digital scale and saucier, and respecting the science of starch gelatinization, you transform a simple root vegetable into a gourmet experience. Now, go forth and glaze with confidence!
The Kitchen Table:
Why are my sweet potatoes mushy?
Mushiness occurs when steam is trapped. Avoid overcrowding your pan and ensure you roast at high heat (400F+). This allows moisture to evaporate quickly, leaving behind a crisp, caramelized exterior while keeping the inside tender.
Can I use light brown sugar instead of dark?
Yes, but dark brown sugar contains more molasses. This provides a deeper, more complex flavor and a more viscous glaze. If using light sugar, add a teaspoon of maple syrup to mimic that rich, earthy depth.
How do I prevent the sugar from burning?
Sugar burns at 350F, but the moisture in potatoes protects it. To be safe, toss your potatoes in oil first, then add the sugar halfway through the roasting process to ensure a perfect golden-brown finish without any bitterness.
What is the best way to cut sweet potatoes for roasting?
Aim for uniform 1-inch cubes using a sharp chef's knife. Uniformity ensures even heat distribution. Use a bench scraper to easily transfer your cuts to the sheet pan without bruising the cellular structure of the potato.