

Imagine the kitchen at sunset; the air is heavy with the scent of toasted peppercorns and the deep, savory promise of slow-cooked protein. There is a specific kind of magic that happens when you commit to stewing beef recipes oven style. It is not just about dinner; it is about the transformation of tough, collagen-dense muscle into something that yields to the mere suggestion of a fork. We are chasing that perfect, viscous sauce and meat that melts like butter. This is where chemistry meets comfort. While a stovetop simmer is fine for the impatient, the oven provides a 360-degree radiant heat environment that ensures even thermal distribution. This prevents the bottom of your heavy-bottomed skillet from scorching while the top stays cold. We are looking for a deep, mahogany crust and a rich, piquant gravy that coats the back of a spoon. Grab your favorite apron and a glass of something bold. We are about to turn a humble cut of meat into a masterpiece of molecular gastronomy that will make your kitchen feel like the best bistro in town.
The Gathers:
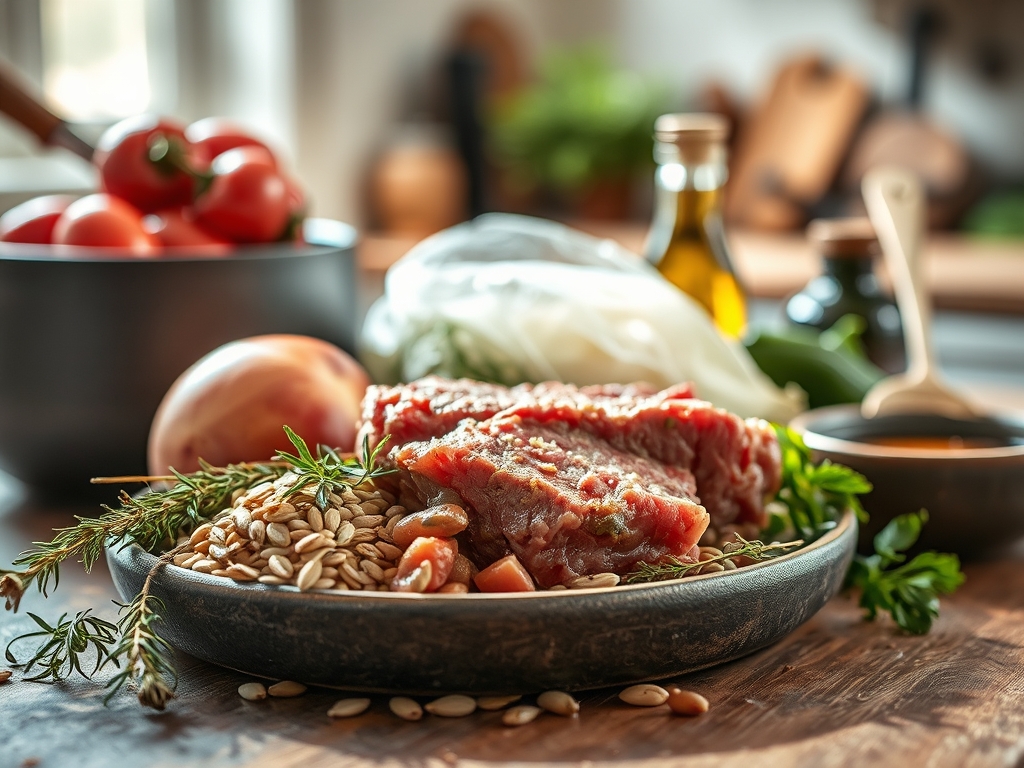
Before we ignite the flame, we must respect the mise-en-place. Your primary subject is three pounds of chuck roast, cubed into uniform two-inch pieces. We choose chuck because of its high intramuscular fat and connective tissue. You will also need a bottle of dry red wine (think Cabernet or Malbec) to deglaze the pan and provide acidity. For the aromatics, gather three large carrots, two stalks of celery, and one massive yellow onion. These form your mirepoix, the holy trinity of flavor. You will also need high-quality beef bone broth, tomato paste for umami depth, and a bundle of fresh thyme and rosemary tied with kitchen twine.
For your smart substitutions, if you are avoiding alcohol, a splash of balsamic vinegar mixed with extra beef stock provides that necessary piquant brightness. If you cannot find chuck, look for bottom round or beef shanks, though shanks will require a longer cook time to render the marrow. Use a microplane to zest a bit of garlic directly into the pot for a more intense infusion than chopping alone can provide. Ensure your salt is kosher for better grip and even distribution.
The Clock: Timing and Chef's Flow
Total time for this endeavor is approximately four hours, but do not let that intimidate you. Your active prep time is a mere 30 minutes. The "Chef's Flow" is all about sequence. You spend the first 15 minutes searing the meat in batches. While the first batch is browning, use a bench scraper to clear your cutting board of chopped vegetables. The middle three hours are entirely hands-off as the oven does the heavy lifting. This is your "passive productivity" window. Finally, allow for a 15-minute rest period once the pot leaves the heat. This allows the muscle fibers to relax and reabsorb the juices, ensuring the meat does not turn into dry string.
The Masterclass:
1. The Great Sear
Pat your beef dry with paper towels until it is bone-dry. Season aggressively with salt. Heat a thin layer of high-smoke-point oil in your Dutch oven until it shimmers. Add the beef in batches, ensuring you do not crowd the pan. Use tongs to flip each piece once a dark brown crust forms.
Pro Tip: This is the Maillard reaction. If the meat is wet, it will steam instead of sear. Steam occurs at 212 degrees Fahrenheit, but the Maillard reaction requires temperatures above 300 degrees to create those complex flavor compounds.
2. Sauté the Aromatics
Remove the meat and add your mirepoix to the remaining fat. Use a wooden spoon to scrape the bottom of the pot. Cook until the onions are translucent and the carrots have softened slightly. Add your tomato paste now and cook it for two minutes until it turns a rusty brick color.
Pro Tip: Sautéing the tomato paste is called pincé. It caramelizes the natural sugars in the tomatoes, removing the raw metallic taste and adding a savory bass note to the sauce.
3. The Deglaze
Pour in your red wine. Use your spoon to vigorously scrape up all the brown bits stuck to the bottom. This is the "fond," and it is concentrated flavor gold. Let the liquid reduce by half.
Pro Tip: Alcohol acts as a solvent. It dissolves flavor compounds that water or fat cannot reach, creating a more multidimensional flavor profile through molecular extraction.
4. The Braising Liquid
Return the beef to the pot along with any accumulated juices. Add your bone broth until the meat is three-quarters submerged. Do not drown it. Add your herb bundle and a couple of bay leaves.
Pro Tip: Keeping the top of the meat exposed to the air in the pot allows for convection browning to continue even while the bottom half braises, resulting in a richer sauce.
5. The Oven Transition
Cover the pot with a tight-fitting lid and slide it into a preheated 325-degree oven. This moderate temperature ensures the liquid stays at a gentle simmer rather than a violent boil.
Pro Tip: A gentle simmer prevents the proteins from tightening too quickly. Rapid boiling causes protein denaturation that results in tough, rubbery meat regardless of how long you cook it.
6. The Vegetable Infusion
About 45 minutes before the timer goes off, add your "service vegetables" like pearl onions or fingerling potatoes. This ensures they are tender but still hold their structural integrity.
Pro Tip: Adding vegetables too early leads to cellulose breakdown, turning your beautiful stew into a mushy puree. Timing is the difference between a rustic stew and baby food.
7. The Thickening Phase
If your sauce is too thin, whisk a tablespoon of softened butter with a tablespoon of flour to create a beurre manié. Stir this into the hot liquid during the last ten minutes of cooking.
Pro Tip: The starch granules in the flour swell and trap water molecules, creating a viscous emulsion that gives the sauce a glossy, professional finish.
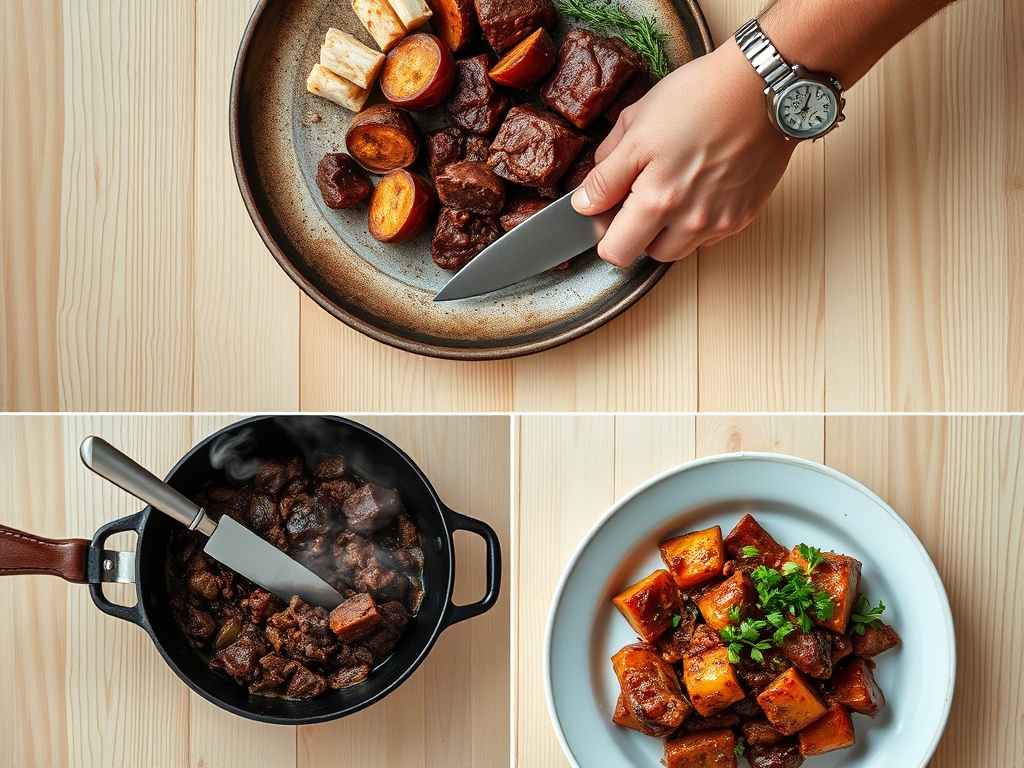
8. The Resting Period
Remove the pot from the oven and let it sit, covered, for 15 to 20 minutes on the counter. Remove the herb bundle and bay leaves before serving.
Pro Tip: This is thermal carryover. The internal temperature will continue to rise slightly, finishing the breakdown of any stubborn connective tissue without overcooking the exterior.
9. The Final Brightness
Just before serving, stir in a teaspoon of fresh lemon juice or a splash of red wine vinegar. Garnish with fresh parsley.
Pro Tip: Acidity acts as a "flavor highlighter." It cuts through the heavy fats and salts, balancing the palate and making the individual flavors of the beef and herbs pop.
The Deep Dive
From a macro nutrition perspective, this dish is a powerhouse of iron, B12, and zinc. A standard serving contains roughly 35 grams of protein. For Keto followers, simply omit the potatoes and flour, thickening instead with a bit of heavy cream or by pureeing a portion of the cooked vegetables. Vegan friends can swap the beef for portobello mushrooms and walnuts, though the cook time will drop significantly. For a Gluten-Free version, use cornstarch or arrowroot powder as your thickening agent.
The Fix-It: Common Pitfalls
- Tough Meat: If it is still chewy, it simply hasn't cooked long enough. Put the lid back on and give it another 30 minutes. The collagen hasn't fully converted to gelatin yet.
- Salty Sauce: If you over-seasoned, add a peeled, halved potato and simmer for 10 minutes. The potato acts as a sponge for excess sodium.
- Greasy Surface: If a layer of oil forms on top, use a wide spoon to skim it off, or drag a clean paper towel lightly across the surface to wick up the fat.
Meal Prep Science: Stew is actually better on day two. As the dish cools, the aromatics continue to infuse the liquid, and the starches stabilize. To reheat, do so slowly in a saucier over low heat, adding a splash of water to loosen the gelatinized sauce.
The Wrap-Up
Mastering stewing beef recipes oven style is a rite of passage for any serious home cook. It teaches you patience, the importance of searing, and the delicate balance of acidity and fat. There is no better feeling than pulling a heavy pot out of the oven and revealing a bubbling, fragrant masterpiece. Whether you are feeding a crowd or prepping for a busy week, this technique is your secret weapon for culinary success. Now, go forth and braise with confidence!
The Kitchen Table
Can I use lean meat like sirloin for stew?
Lean cuts like sirloin lack the necessary collagen and fat to survive a long braise. They will become dry and tough. Stick to chuck or round for the best results in stewing beef recipes oven.
What is the best pot for oven stewing?
An enameled cast-iron Dutch oven is the gold standard. Its heavy walls retain heat exceptionally well, ensuring a constant temperature and preventing the liquid from fluctuating between boiling and simmering.
Why is my stew meat gray instead of brown?
Gray meat is a result of overcrowding the pan or having too much moisture. This causes the meat to steam in its own juices. Sear in small batches and pat the meat dry first.
How do I make my stew sauce glossier?
The secret is a beurre manié or a cold butter whisk-in at the very end. The fat coats the starch molecules, creating a silky, reflective sheen that looks beautiful on the plate.