
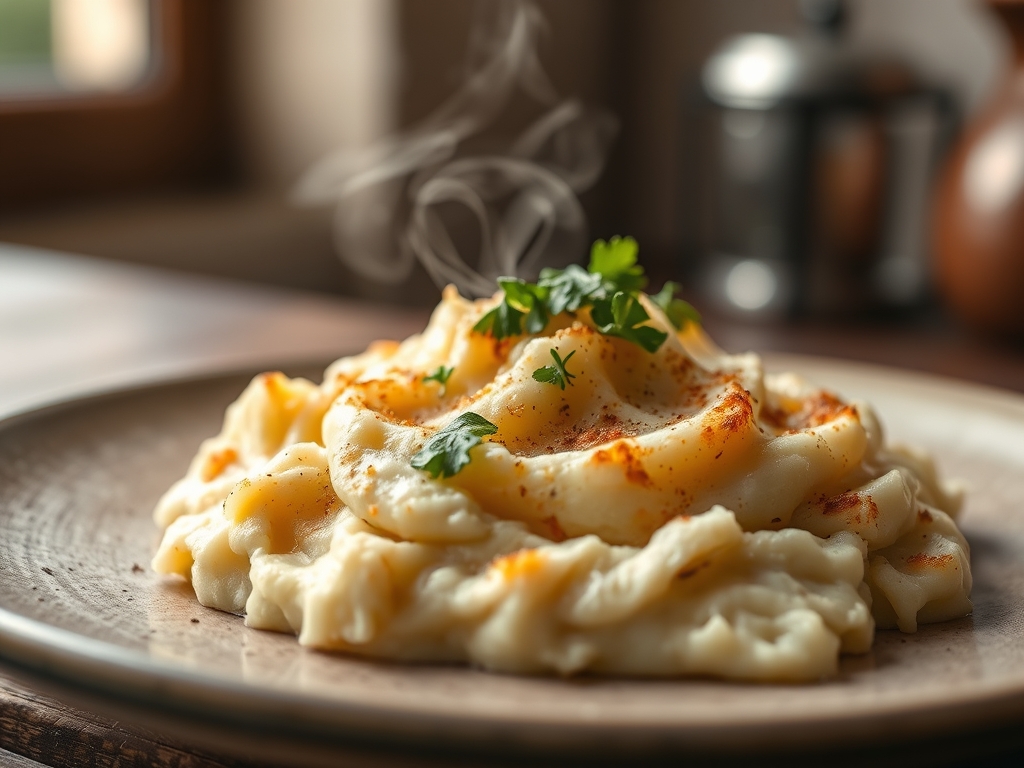
Picture a steam-filled kitchen where the aroma of earthy Yukon Golds meets the sharp, savory scent of roasted garlic. You are craving that cloud-like texture, but the carton in the fridge is empty or simply off-limits. Finding incredible mashed potato recipes no milk is not just a dietary pivot; it is a masterclass in flavor extraction and textural engineering. We are moving beyond the bland, watery mash of yesterday. Today, we are leveraging molecular chemistry to create a dish so decadent that your guests will never suspect the absence of dairy. We will use heat, friction, and emulsification to transform a humble tuber into a velvet masterpiece.
The Gathers:
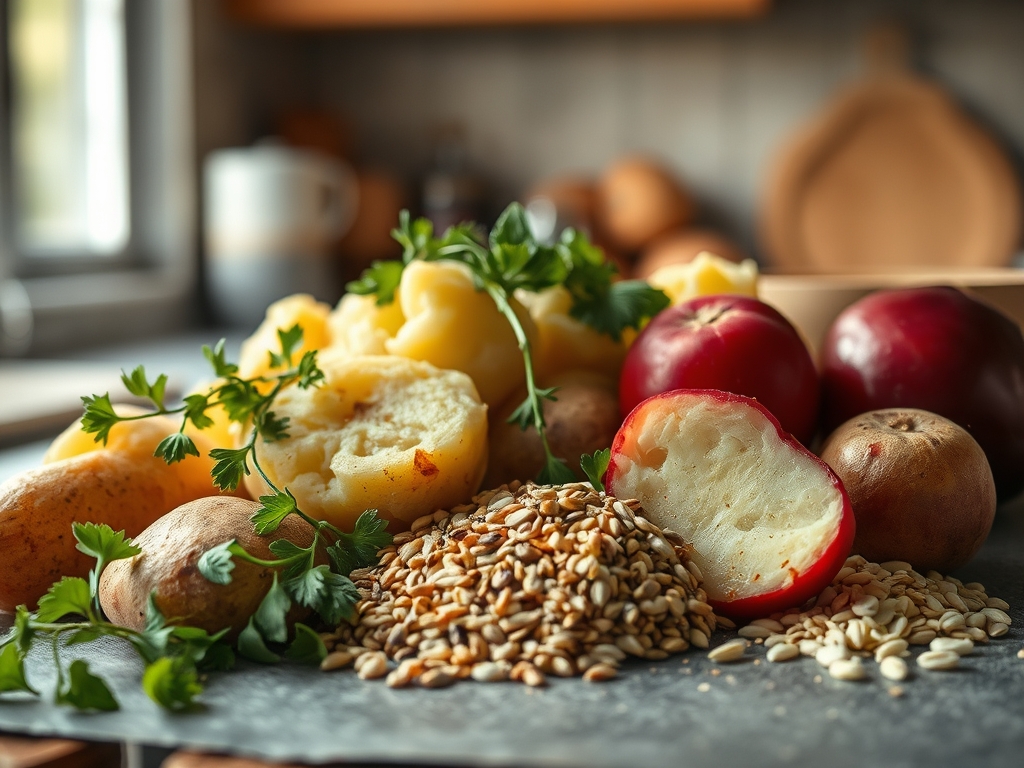
Before we ignite the burner, your mise-en-place must be precise. Professional results require a balance of starch, fat, and liquid. Start with high-starch potatoes like Russets for fluffiness or Yukon Golds for a naturally buttery, viscous interior. You will need a high-quality fat source to replace the mouthfeel of cream. Reach for extra virgin olive oil, refined coconut oil, or even rendered duck fat if you are not strictly vegan.
For the liquid base, vegetable stock or the starchy potato cooking water provides a savory backbone. Do not forget your aromatics. A microplane is essential for grating fresh garlic or lemon zest directly into your fat source, ensuring the essential oils permeate every cell of the potato. Use a digital scale to measure your potatoes; professional consistency starts with weight, not volume. Have your bench scraper ready to clear the board and your saucier waiting to warm your liquids. Cold liquids are the enemy of a smooth emulsion.
The Clock
Efficiency in the kitchen is about the Chef's Flow, a sequence that minimizes downtime. Your total active prep time is roughly 15 minutes, with a 20-minute simmer and a 5-minute finishing stage. While the potatoes boil, use that window to infuse your fats. If you are using olive oil, gently warm it in a small pan with rosemary or thyme. This is not just cooking; it is a strategic use of time to ensure that the moment the potatoes are drained, your flavor delivery system is at the optimal temperature.
The Masterclass:
1. The Precision Cut
Peel and dice your potatoes into uniform one-inch cubes. Uniformity is the secret to even cooking; if pieces vary in size, the small ones will turn to glue before the large ones are tender.
Pro Tip: Cutting potatoes into smaller, uniform shapes increases the surface area for gelatinization, ensuring the starch granules swell evenly without bursting prematurely.
2. The Cold Start
Place your potatoes in a heavy-bottomed pot and cover with cold, heavily salted water. Starting with cold water ensures the outside of the potato does not overcook while the center remains hard.
Pro Tip: Salt acts as a seasoning agent that penetrates the potato's cellular structure during the heating process, preventing a flat, one-dimensional flavor profile later.
3. The Gentle Simmer
Bring the water to a boil, then immediately reduce to a steady simmer. Violent boiling can cause the potatoes to collide and break apart, leading to a loss of essential solids.
Pro Tip: Maintaining a temperature just below boiling prevents the excessive release of amylopectin, the starch component responsible for a "gummy" or "sticky" texture.
4. The Steam Dry
Once fork-tender, drain the potatoes into a colander. Return them to the hot pot for sixty seconds over low heat, shaking them gently to evaporate excess moisture.
Pro Tip: This step utilizes thermal carryover to remove residual water. Removing moisture allows the potato to act like a sponge, ready to absorb your flavored fats rather than water.
5. The Mechanical Breakdown
Pass the potatoes through a ricer or a food mill. Avoid using a blender or food processor at all costs, as the high-speed blades will tear the starch molecules and create a paste.
Pro Tip: A ricer provides the ultimate aeration, separating the potato into tiny, dry granules that create a light, pillowy foundation for your emulsifiers.
6. The Fat Infusion
Slowly drizzle in your chosen fat while the potatoes are still steaming hot. Use a silicone spatula to fold the fat in gently rather than beating it.
Pro Tip: Heat reduces the viscosity of the fat, allowing it to coat the potato starch granules more effectively, creating a stable lipid-starch emulsion.
7. The Liquid Incorporation
Gradually add your warm broth or reserved cooking water. Add only a few tablespoons at a time, stirring until fully incorporated before adding more.
Pro Tip: Adding liquids gradually prevents the mixture from breaking. Warm liquids maintain the temperature of the starches, keeping them pliable and smooth.
8. The Flavor Layering
Fold in your roasted garlic, nutritional yeast for cheesiness, or fresh herbs. Use your microplane for a final dusting of black pepper or nutmeg.
Pro Tip: Adding aromatics at the end preserves the volatile compounds that provide bright, high-note flavors which would otherwise dissipate during the boiling process.
9. The Final Polish
Taste and adjust for acidity. A small squeeze of lemon juice or a drop of apple cider vinegar can brighten the entire dish.
Pro Tip: Acidity acts as a flavor enhancer that cuts through the heaviness of the fats, balancing the palate and highlighting the natural sweetness of the potato.
The Deep Dive
From a macro perspective, mashed potato recipes no milk are often lower in saturated fats and calories than their traditional counterparts, especially if you opt for heart-healthy olive oil or nutrient-dense bone broth. For those following a Keto lifestyle, you can swap half the potatoes for steamed cauliflower, though the starch chemistry will change significantly.
The Fix-It: If your mash turns out gummy, you likely over-worked the starch; try folding in a bit more hot liquid to loosen it, but do not over-mix. If it is too thin, a pinch of potato flakes or a quick reduction of the mash in a wide pan can help. If it is bland, increase the salt and acidity; potatoes are notorious salt-absorbers.
For meal prep, remember that starch retrogradation occurs as potatoes cool, making them firm. To achieve "day-one" quality when reheating, add a splash of hot broth and stir over low heat. This re-hydrates the starch molecules and restores the original creamy texture without the need for dairy.
The Wrap-Up
Mastering mashed potato recipes no milk is a liberating culinary achievement. You have moved beyond the crutch of heavy cream and discovered how to manipulate starch and fat to create something truly sophisticated. Whether you are hosting a vegan dinner or simply clearing out the pantry, these techniques ensure your side dish is never an afterthought. Grab your ricer, trust the science, and prepare to serve the most luxurious mash your kitchen has ever seen.
The Kitchen Table
Can I use a hand mixer for these potatoes?
Avoid hand mixers for dairy-free mash. The high-speed rotation shears starch granules, releasing excess amylose and turning your potatoes into a sticky, glue-like paste. Use a ricer or a manual masher for a light, fluffy texture every time.
What is the best milk substitute for creaminess?
Full-fat oat milk or cashew cream offers the best neutral flavor and creamy mouthfeel. If you want a savory profile, use a high-quality vegetable or chicken stock enriched with a tablespoon of extra virgin olive oil for essential lipids.
Why are my dairy-free potatoes grey?
Discoloration usually results from enzymatic browning or a reaction with aluminum cookware. Use stainless steel pots and add a teaspoon of lemon juice or white vinegar to the boiling water to maintain a bright, vibrant potato color.
How do I store leftovers without them getting dry?
Store leftovers in an airtight container with a piece of plastic wrap pressed directly onto the surface of the potatoes. This prevents a skin from forming and blocks oxygen, which can lead to off-flavors and a grainy, dehydrated texture.